ShopDreamUp AI ArtDreamUp

Deviation Actions


Suggested Deviants


Suggested Collections


You Might Like…


Description
Step 6. Finishing Details & Clean-Up
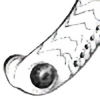
Here at the top at A is what the page usually looks like when I scan it in. The skeleton is drawn entirely in pencil, and my favorite ones for this task are a Koh-I-Noor Rapidomatic 0.3mm (for drawing bones) and a regular Pentel 0.5mm (the green one, for the outline, usually). In this, I've also taken all the bones and put an outline around them. Unfortunately, this tutorial will not be able to go into the detail needed to learn how I get here. Suffice it to say I would need to use as many steps to build a general picture on outlines. My rule of thumb for outlines is that I include only muscle, skin, and claw and beak sheaths is needed. If it's a mammal, I include the lips, but never fur or feathers. The reason for this is to show the more dynamic relationship of muscles to bone in the animal, not because I think it was naked flesh. Scales I also exclude, though in some crocs I've done, because the scute sheaths are made of hardened keratin, I will outline them as well. I will also correct errors in lines I don't want to erase by filling in the area with pencil, as you can see in the hand. Small areas that might be difficult to finish in Photoshop, such as the empty spaces between vertebrae contacting each other (called choanae), are also filled in.
The tail is broken up because instead of shrinking the animal to fit, and therefore loose detail, and place continuations of long parts, sometimes including the head, around the main skeleton. Or on another sheet, if there isn't room. I've had to do this latter for some sauropod skeletons, for example, which scale so large for detail there was no room to fit them elsewhere. Incidentally, I scan using a Canon CanoScan LiDE 35, which is a decent $80 model here, and thin, and does what I need it to do.
In B, I have cut and pasted the parts of the tail, and rotated them as neccessary to make the pieces fit. There's a trick, though. In the scan image, you'll notice there are little marks all over it, and in front of the shoulder, an arrow. These are instructions to me. They tell me I have that many vertebra lengths within the gap I've identified in the tail, and that i should move the should forward. Actually, I decided I didn't need to do that last bit. Originally, the tail was going to curve upward, but I decided the tail serves equally bending down, especially since that's how the vertebrae ended up curving. Yeah, I'm a slave to what ends up on the paper a lot. Initial cleanup occurs here as a neccessity to remove smudges, markes, and to preset the brightness and sharpness of the lines. Under my standard scan, I use Adobe Photoshop 7.0 to set the brightness to about 10, and the contrast further to 15 or 25, or even further to 35. I then use the dodge tool set to highlights to take care of smudges, and the burn too set to midtones to darken and sharpen detail areas. I then have to carefully go over every single line I've scanned to look for breaks were there shouldn't be, where the scanning lightened them up or were too faint to scan in, or because I just forgot to complete that .03mm space that Photoshop can detect.
When I am confidant I am done, I use the fill tool set to black, and simply start making all non-bones black. I will then use the dodge and burn tools to go about cleaning up again, and fuzzy lines on the bones and margins are cleaned using the line tool at various thicknesses, and as I find both in black and white since I will have to clean inside the bone margins. Here is where it is important that I use a pencil with the diameter of 0.3mm (30% of a milimeter, 3% of a centimeter, and very, very fragile and prone to breaking): the thickness of the line is set to the margins of the bone extent. If this sounds complex, let me rephrase: if I were to draw a box of 1cm x 1cm and fill in all but the box, the actual dimensions of the box will likely be less than 1cm x 1cm, rather close to 0.9cm x 0.9cm instewad. If I were to fill in just the box, the actual box will be 1.1cm squared or so. This, while not REALLY a problem at this scale, becomes an issue when you use a thicker leaded pencil or, dare say, a pen. Pen ink, unlike pencil (and this includes gel and archival pens) always expands on contact with paper, whereas pencil graphite retains the diameter of the lead tip touching the paper. So the thinner the better. Plus, the Koh-I-Noor is an awesome pencil to use.
Finally, when everything is clean, I am left with C. Notice in the bottom right corner there is a dark, thick line and some writing. This is the subject of the very last part of this project, part 6.
Image size
1000x1406px 221.72 KB
© 2005 - 2024 Qilong
Comments3
Join the community to add your comment. Already a deviant? Log In
Interesting way of doing it! Thanks for the demo!